Introduction:
Re:Cap –:
In the last post we talked about the SSH protocol. A little bit of how it allows you to securely connect to a remote resource such as a git repository like github.com. We then talked about how to generate SSH Key pairs and add public keys to GitHub in order to allow a software engineer to commit code to a remote repository.
BLUF (Bottom Line Up Front):
This blog post will discuss one of Git’s killer features: Branching! Branching offers seismic opportunities to software engineers allowing them to shape their workflow in such a way that provides the least friction and most resilience in their workflow. In this post we will be talking about to use Git’s branching feature. I will then explain how I use this feature to reduce scope creep and develop features for my own side project intentionally.
Side Quest: A tangent about pointers:
To really understand branching you have to have the mental model for pointer’s at least at an entry level. Essentially, you don’t have to know how to implement a pointer but you have to be able to reason what they are.
What is a Pointer (A library analogy)
The best way to describe a pointer is imagine you are in a library (and you are asked to go about doing some research. You go up to the librarian and ask ” I would like all the books you have on pointers please. “
The librarian sits you down in front of their database and instructs you to type in ‘pointers’ in the search bar. The library database gives you multiple books in a list each book has multiple fields including:
- The book name by title
- The ISBN or International Standard Book Number
- The Aisle the book is in
- The shelf the book is on.
- Maybe the author name.
I want to direct you to the 3rd, 4th, and 5th items on this list. Assuming that the books are categorized alphabetical. I am willing to bet given those three data points you would be able to walk on over and grab a book off a shelf.
A computer is however not able to make those reasonable determinations with data. A computer instead views memory as a contiguous set of numbers such as 0 to 4,000,000. These numbers are generally stored in a Virtual Memory Look up table. Known as a (TLB). These numbers often map to actual accessible parts of hardware where data is stored. So for a computer to find information on say an electronic book stored in it’s own system, it needs to know the number in the TLB to access the book. Because there is no rhyme or reason to what data will be placed in what segment of hardware other than availability of space in memory we need a reliable way to track the location of our data. This is known as a pointer.
So for this series the only mental model you really need to have on a pointer is that it tells me where on my computer I can find the information I have stored.
Whats does pointer’s have to do with git?:
So you may be wondering what does a discussion with pointers have to do about Git. Well, simply put Git stores the location of your latest commit using a series of numbers. This set of numbers is calculated using a particularly famous cryptographic algorithm SHA-1. I refer you for the time being to the Wikipedia page for SHA-1 if you would like to learn more ( https://en.wikipedia.org/wiki/SHA-1) However, a brief summary is that SHA-1 gives a program a unique way to number things. This helps us solve the problem ” How do I find my data?”
The pointer in Git has more to do with where in the history or versioning of the project am I? Every time you ‘commit’ a change to your repository git creates a change to the repository history. Every time you ‘merge a change’ git creates changes to the history (more on merges in the next post). In the git vernacular these are called Snapshots. Each snapshot is the individual change in the history. For Git to determine what change your repository is currently using it uses a pointer. Git has a very special pointer for identifying where ‘your repository’ on your local computer is, it, is called HEAD
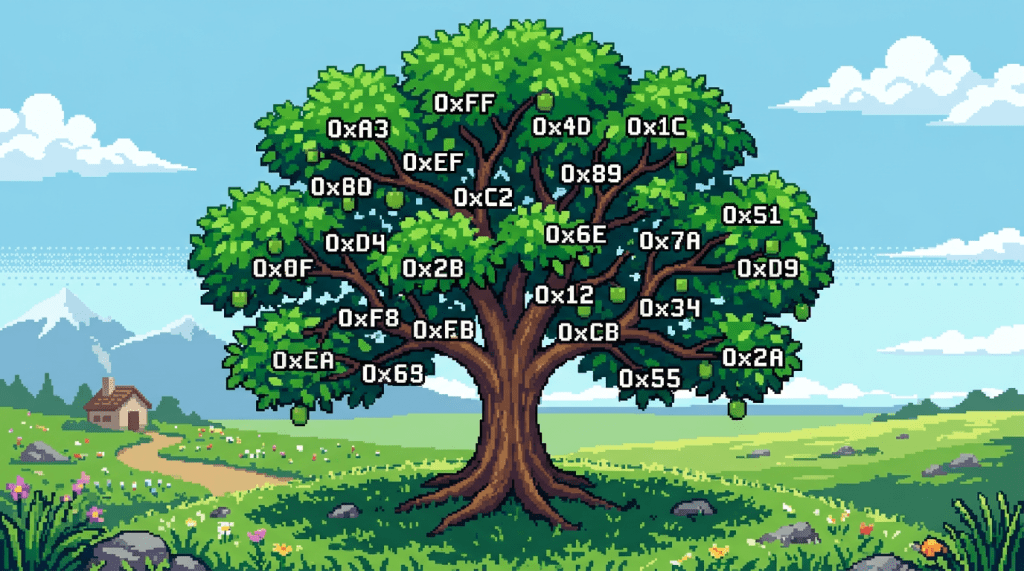
An example both in git log and pictorially can be seen below:
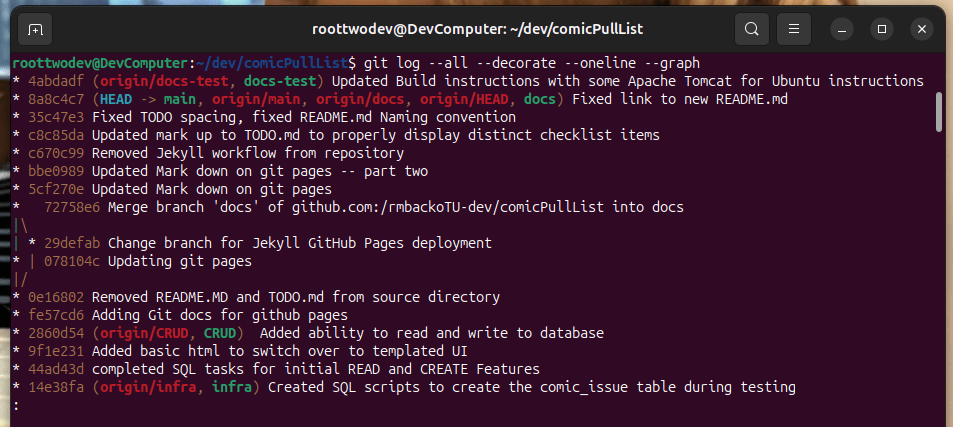
Below is the last 7 commits of the same commit history as show above:

Notice on both the git log and the diagram the head pointer is pointed at the commit snapshot labelled 8a8c4c7. In this example it is because I just finished some work in the doc test branch, and I have not merged them with the main branch. So the log notices all the commits are present it just has not adjusted the head pointer in the main branch because the changes are not merged up to the main branch yet.
Back to Branching: What is a branch anyway?
Now that we have the essential knowledge on the HEAD pointer we can move on to branching. In short branching allows us to create a set of changes while maintaining the version of another set of snapshots. Essentially we can make changes in a checked out branch and if we do not merge those changes then those changes will not incorporate in the version history shown when we check out a branch that the was derived from to make the changes.
For the example above you will see a lot of the different topic branches I have created for project including CRUD (Create Read Update Delete), infra,docs, and docs-test. You will also notice there are other pointers, which I did not notate for each branch that states what commit is the current commit if I switch back to that branch. For example, I have not worked on the feature of my application in a while so it’s pointer is 11 commits behind the HEAD pointer for main.
So in short branching is in git is a way we can work on a feature, topic, or idea separate from our main application, maintain versions of it, and save it to our main set of work after we are certain that the idea works.
What commands do I run?:
So before I get into how I use branching lets talk about how to create, list, and delete branches:
The first command is to create a new branch. To create a branch we actually have to check out the branch
git checkout -b <branch name>
This command will also only progress our head pointer along changes we have made in this branch whenever we commit. If you need to switch to another existing branch without creating the branch we can simply run
git checkout <branch name>
If we do the following command while the branch is checked out any commit will be pointed to by HEAD. If we checkout another branch if the branch is ahead in git history we will see the pointer as the name of the branch
git log --oneline
The –oneline argument ensures our display of git history does not become. If you would like to see what the pointers looks like for all your branches created use the –all tag
Once you start making branches you will need a way to determine which branches you have available. To do that we can use the following command:
git branch --all
You may also wish to ensure that your remote repository has a copy of the branch you created. To do this we need to use the -u command in push to push the branch upstream this can be done by specifying
git push -u origin <branch name>
Something to note is if you committed anything to the branch this command will also push your commits to that branch up to the remote repository.
Lastly once we are done with a branch we may no longer have a use for it locally and remotely. To delete a repository locally we do the following command:
git branch --delete <branch name>
To remove a branch remotely we need to do the following command:
git push origin --delete <branch name>
How I use branches to separate code intentionally?
Long before I decided to create a git blog I have been working on a side project. The goal was to inventory and track not only the comic books in my collection, but also keep a running list of next issues in series that I would like to read. When I started the project I had a good grip of Java fundamentals, and even an understanding of Object Oriented Design pattern’s. So why could I not make any meaningful progress in my project? It has to do with two words… Scope Creep
What is Scope Creep?:
Scope creep in Software Engineering is when you constantly have idea’s or want to build bigger and better systems without the fundamentals being in place. The example from my application was initially I had started everything went into a ‘main’ branch. Which means I effectively was not using branching in git at all. Even worse I had an elaborate idea for what to do with my comic book issue class. I have included an example in the next section. What I failed to realize is that there is a way to incrementally build a feature in an application to guarantee strong forward momentum. This method is called scoping to a minimum viable product. Scoping to a minimum viable product keeps each feature ‘slice’ separate. So next we will explain what is not, and what is a minimum viable product
What is a Minimum Viable Product?:
A minimum viable product is the bare minimum you expect a user to be able to do reliably with an application. Before I scoped my project to a minimum viable product my feature list looked like this.
- Track the issue name of a comic series
- Track the year of the run
- Track the issue number of the comic series
- Track if the issue was part of a collection
- Track if the issue was purchased or not
- Track if the issue had a new comic to purchase
- Track if the next issue of the comic was a run off series.
- Implement a login
- Allow different users to keep track of different comic books that belong to them
- Allow users to lend comic books to others to read
- Determine a way to create a time limit for how long a friend will have a comic that got loaned to them
- Some how test it all
- Some how provide an interface to interact with it all.
- And more….
The list kept growing, because the ideas kept coming, But you know what did not keep coming. The code. So after I had a come to grips with reality moment I said what really do I need this application to do. What is the minimum viable product. This is the list I came up with:
- Create a comic issue data item using the comic series name, year of the comic run and issue number
- Create a database table that will store all of this information
- Create Create, Read, Update Delete SQL queries that will allow the application to store, retrieve, edit, and delete this information.
- Provide a interface using JSP’s and Servlet’s to display information to the user, and capture information from the user
- Come up with ways to test it all.
- Document the progress with the current set of features, way’s to build the application across multiple computers, and a description of what was built
If you notice the second set of features are centered around one question. How do I store, retrieve, edit, and remove information about comic book issues. That is fundamentally what the Comic book inventory application should do. All other features add to the scope. This is the projects Minimum Viable product.
Again what does this have to do with branching?:
So lets relate this all back to branching, and commits. How does Git help reduce Scope creep? The answer is using branches like isolated sets of features. There are two ways you can do this.
- Create a minimum viable feature set. For example Create, Read, Update, and Delete or CRUD features are a minimum viable feature set to me. (Though they maybe certainly large depending on the set of data you are looking to implement those features for).
- Create a user requirement: “As a <user> I shall/may be able to do <feature> ” (This may need more explanation)
Essentially a user requirement is an action you would like your user to perform. An example could be “As a comic book database user I shall be able to create a new comic book record that includes a issue name, issue number, and run year”.
Essentially how these scenario’s play out within git is that you never commit to your main/master branch. Or the default branch that exist when you create your project. Instead you create branches for each feature. Then you commit to the branches and then when the features are complete merge the features into main. This allows the main branch to stay stable and your feature branch to stay small manageable, and focused.
For example: My list of branches are below:
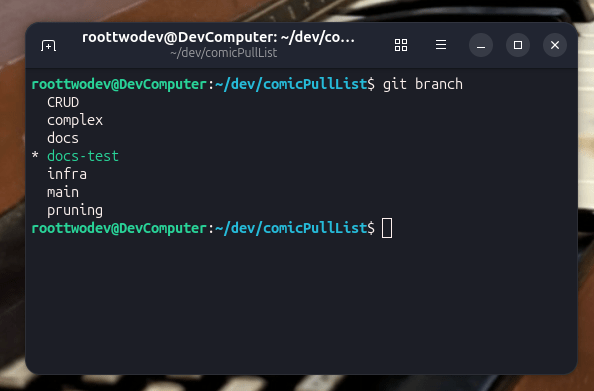
Each of these branches have an express purpose in my repository. Here is how I currently separate my work.
- CRUD: All features related to Create, Read, Update, and Delete.
- complex: Any feature that fits into the set of features that are considered scope creep for the given goal.
- docs: A set of Markdown files used to describe what is left to Todo on the project TODO.md, a description of the project README.md, how to build the project BuildInstructions.md (These are all displayed on github pages which will be discussed in a future blog post.)
- docs-test: It is usually a good idea to test BuildInstructions before you tell folks that is how to build the code. doc-test is a segment of build instruction mark down that needs to be tested across several operating environments.
- Infra: This is all of the work needed to support the application, this includes changes to Tomcat server configuration files, MySQL config files, files related to environment variables, or other concerns necessary when setting up services related to running a web application.
- pruning: This is a temporary branch where all of the scope creep features that I previously implemented are stored. To be implemented at a later date when the MVP is completed.
- main: This is the known good release. This is where things are merged to when they are completed, and tested.
But ultimately it comes down to commits:
The goal when you write a commit is to keep the commit as simple and precise as possible. You want to avoid session’s where all you commit is a large monolith of code. For example lets look at the list of commits I added to the CRUD branch and related branches. Then lets compare them to some of the task’s I had hope to accomplish within those commits:
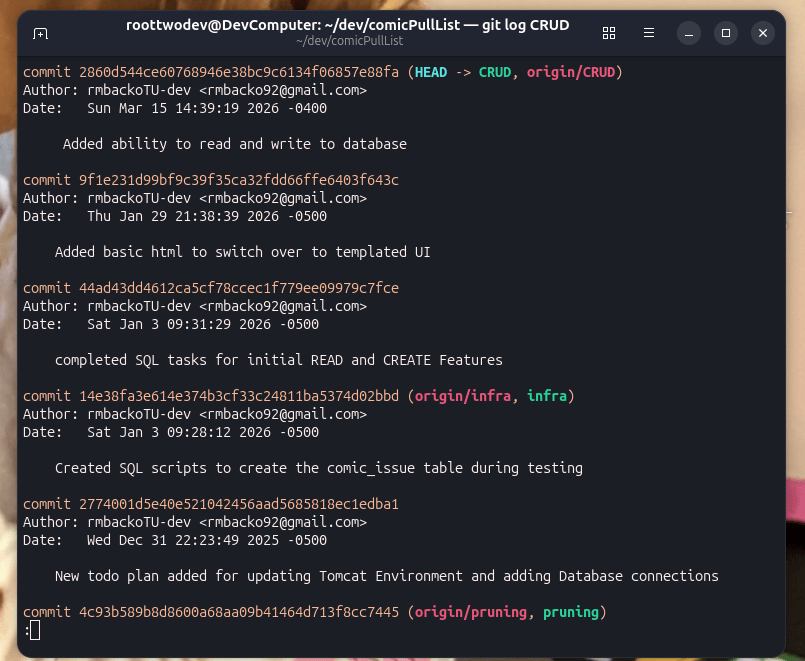
If you notice the commits are constrained to what I could do in a single session. However, it is often even a good idea to just commit when you finish a given step of a task. For example a commit could be created for each Add and Read feature, but I wanted to be able to add and test both features. A commit could be added before testing and an additional commit added when the feature is tested. As long as the commits do not get merged into main you can effectively split a series of commits into as many commits as you would like to get the task you set out to do done.
For example some of my Todo’s in my todo.md include:
[X] Create a ComicCRUDActions class which will contain in-line SQL for Read and create operations.
[X] Create a ListComic servlet and test that implements Read actions from ComicCRUDactions.
[X] Create a ComicFormServlet and test that implements Create actions from ComicCRUDactions.
This is effectively all within my Add and Read feature, which means the commits could have been broken out into 3 commits. Commits can be broken out even smaller, it all depends on the time you have available for each session and how you would like to track the work.
Ultimately the strategy for using git effectively as a project management tool is to first divide tasks into the lowest set of tasks needed to complete the action, create categorizations or topics for the actions and create branches based on those branches. Then split the work in those branches across multiple commits.
Lastly note in the logs how each commit describes what went into that commit. To ensure you can track work accurately been sessions it is important to have a consistent strategy for implementing commit messages. At a minimum a commit message should be structured like the below message, it should be a framing of the work that was done within that commit:
git commit -m 'Updated mark up to TODO.md to properly display distinct checklist items'
When working for an organization they may require you place a ticket, or task number next to the message to track across a project management plat form like below:
git commit -m 'CPL-12 Updated mark up to TODO.md to properly display distinct checklist items'
Knowing what work is done for a given task is a great benefit to any project manager and they will surely thank you later.
Conclusion
That wraps up the git branching feature and using it within a real project to manage work. In the next post we will discuss how to take all the features we separated and merge them together.
This Post:
This post we discussed the background and uses for git branching. First we took a detour to understand how git uses pointers to organize information about the versions of a code repository. Then we discussed how keeping track of HEAD is important to understand which set of changes are occurring within a branch. We illustrated some of the most common commands for branching in git. Then I illustrated how I am using git branches and commits to keep segments of work small and manageable.
Next Post:
In the next post in this series we will turn our focus to putting combining our branches back together using merge, and diff.
We will also discuss how to minimize the number of git commits being published to your main branch using a squash commit. I will also show off how I use this strategy in my own repository to make multiple document drafts and merge them up when they are all tested.
References:
- Chacon, S., & Straub, B. (2014). Pro Git (2nd ed.). Apress.
https://doi.org/10.1007/978-1-4842-0077-3
- Wikipedia contributors. (2024). SHA-1. Wikipedia. https://en.wikipedia.org/wiki/SHA-1


Leave a comment