
Introduction:
Recap: In the last post of this series we discussed starting your first git repository and tracking the version history. This post we will work on continuing that discussion in how to connect to a remote server such as GitHub.
Bottom line up front (BLUF): This guide will provide the tools and the underlying understanding needed to set up a remote connection to a remote git server. The goal is not only to provide readers with the steps connect to git via SSH, but also to build an understanding core concepts of SSH authentication.
Securely getting files from a remote Git server (using Github as an example)
About SSH:
SSH is known as secure shell. It is a secure networking protocol originally intended for the secure remote administration. From the RFC itself SSH is a protocol for secure remote login and other secure network services over an insecure network (RFC 4251, Ylonen, Lonvick). SSH is a client-server architecture meaning that in any given SSH connection one computer serves as the server, and the other client serves as the client. The server in this case would be the system we are connecting to such as GitHub, the client is the system connecting our local computer. Git provides use the utility via host keys to authenticate to our server to prove that we are who we say we are. Once authenticated git provides SSH Transport which forms a encrypted tunnel using a well known encryption algorithm (RFC 4251-Section 9 Security Considerations, Ylonen, Lonvick).
Now that we have a little background on what SSH we can start using it.
Git Bash should have an SSH client installed by default. Additionally most Linux Distributions as well as Mac OSX will have a copy of SSH installed on the operating system by default. Before we begin lets learn about SSH-Key gen and Key based cryptography.
Sidebar–So what?
Back when I started working in IT, telnet was the popular was not remote into Cisco routers. You would connect a light blue cable from serial port to your management port on your router and you would issue all sorts of commands. I could tell the router to set up a route between these two host. I could tell the router what port hosted the internet, what port hosted all the computers in my internal network, and I could use protocols such a Neighbor Discovery Protocol (NDP) to learn more about devices I was connected to. Now a days telnet is one of the most insecure protocols you can use. Namely because telnet does not offer any sort of encryption. Even if my Cisco router asked me authenticate with it, my passwords would be sent if not in the clear in a format that could easily be captured and re-transmitted to gain access to devices on my network and much more. The same applies to a remote git repository. Imagine someone getting into your git repository, messing up all your files, deleting files, and adding changes to your repository that you did not authorize. This is the basis behind why remote git servers often use SSH. It provides implicit trust of the person connecting to the server.
Key Based authentication:
From the manual pages of SSH we get this description for Key based authentication using SSH.
“Public key authentication works as follows: The scheme is based on public-key cryptography, using cryptosystems where encryption and decryption are done using separate keys, and it is unfeasible to derive the decryption key from the encryption key. The idea is that each user creates a public/private key pair for authentication purposes. The server knows the public key, and only the user knows the private key. SSH implements public key authentication protocol automatically, using one of the ECDSA, Ed25519 or RSA algorithms.” – (SSH Man pages)
A more simplified definition is that public key cryptography uses one of the 3 encryption algorithms ECDSA (Elliptic Curve Digital Signature Algorithm) , ED25519 (Edwards-Curve Digital Signature Algorithm), or RSA (Rivest-Shamir-Aldeman). The last two are algorithm’s are named after their creators. Each is interesting in their own right. But all three do something very similar, they use what is known as a One-Way function.
A more simplified definition is that public key cryptography uses one of the 3 encryption algorithms ECDSA (Elliptic Curve Digital Signature Algorithm) , ED25519 (Edwards-Curve Digital Signature Algorithm), or RSA (Rivest-Shamir-Aldeman). The last two are algorithm’s are named after their creators. Each is interesting in their own right. But all three do something very similar, they use what is known as a One-Way function.
A One Way function is a function who’s answer is not retrievable through traditional means of algebra. So thinking way back to high school algebra, the easiest way to explain a one way function is that a one way function is an algebra problem that is not easily solvable. In the case of these algorithm’s unsolvable means that there are likely multiple solutions to the problem with out any clear way to figure out which solution is the solution the algorithm is using. (Introduction to Cryptography with Coding Theory, Trappe, Washington)
On to the next part of public key authentication is the difference between the public key, and the private key. The public key is the key we share with both of our hosts, our host retains a copy and the remote host retains a copy. The private key on the other hand is unique for each end of the communication our host has a private key, which is different from the remote host private key. SSH uses these keys and the data sent back and forth to perform the one way function. (Introduction to Cryptography with Coding Theory, Trappe, Washington)
On the senders end the data which is plain text is plugged in to the one way function with the sender’s private key and public key. The result is the encrypted message. (Introduction to Cryptography with Coding Theory, Trappe, Washington)
On the receivers end the encrypted message is input into a different function with the public key, and the receivers private key. To receive the the plain text message again. (Introduction to Cryptography with Coding Theory, Trappe, Washington)
This is a large over simplification of what is actually going on under the hood. I urge you to learn more cryptography about cryptography if your are interested in the inner workings of encryption. For a undergraduate level introduction I recommend Introduction to Cryptography with Coding Theory by Wade Trappe and Lawrence C. Washington. For a more fiction telling of the context in which cryptography is used I highly recommend Cryptonomicon by Neal Stephenson. While it is a long book and skews a little bit on the mature side for content it is good at highlighting the ways in which cryptography is used.
How to Create a Key pair:
To create a key pair we use the command ssh-keygen. Before we begin create a folder in your home directory.
1. First Navigate to your home directory:
For Windows Users this is
“C:/Users/<Your Users Name>/” .
For linux and Mac users navigate to
/home/<your user name>
2. Create a directory named .ssh using the mkdir command in git-bash or (if you are on mac or linux) your systems command prompt
WINDOWS:
dir .ssh
LINUX/MAC:
mkdir .ssh
3. Navigate into the directory using the ‘cd .ssh’ command in Git Bash (for Windows) or in your command prompt (for mac or linux)
WINDOWS/MAC/LINUX:
cd .ssh
Next we will create our Key pair.
For this example we will be creating a commonly used key pair, and RSA Keypair.
3. The command to do this is:
ssh-keygen -b 4096 -C “A key for git repository” -t rsa
Lets pull this command apart to figure out what it is doing. First lets start with the -b flag. The Man pages for ssh-keygen give us the following:
-b Specifies the number of bits in the key to create. For RSA keys, the minimum size is 1024 bits and the default is 3072 bits. Generally, 3072 bits is considered sufficient. For ECDSA keys, the -b flag determines the key length by selecting from one of three elliptic curve sizes: 256,384 or 521 bits. Attempting to use bit lengths other than these three values for ECDSA keys will fail. ECDSA-SK, Ed25519 and Ed25519-SK keys have a fixed length and the -b flag will be ignored (ssh-keygen man pages).
The b flag states how many bits the key will use. I typically will specify 4096 you are free to use 3072 if you would like as it states in the man pages. The bit size must be exponentiation of 2. with a minimum of 1024 which is 29. 4096 is 212 . Generally speaking the larger the key the less likely an attacker is to intercept and decrypt the message through brute force.
Moving on to the -C flag. This is a comment. This is included on your public key file output and is used to tell both the sender and the receiver what they key is for. I like to use this, because GitHub will generally write out your comment in their user interface. This gives me a better way to distinguish between multiple keys I have made.
Last but not least is the -t flag. The -t flag specifies the algorithm. The choices are ECDSA, ECDSA-SK, ED25519, ED25519-SK, and RSA. For this example we are using RSA. Note that the SK options on the other two algorithms are for the point of this blog, are additional cryptographic features which are added to their non-SK variants. This is to say these options are not different from the 3 algorithm’s mentioned earlier in their base implementations.
When you enter in the above command ssh-keygen will prompt you about the following
1. Enter the file to save the public key (<you .ssh directory/id_rsa.pub>) Press enter to use the default. This is likely the most common option
2. Enter a passphrase for <you .ssh directory/id_rsa>: Press enter if you do not want a passphrase. While the choice to use a passphrase is yours to make. I recommend one, but ensure it is something you will remember, you will be using this often.
Once these prompts are created SSH will generate ASCII Art representing the key it created.
You should be able to run an ‘ls’ command in your .ssh directory and see three files authorized_keys, id_rsa, and id_rsa.pub. The id_rsa.pub is the public key this is the key we can tell GitHub about to communicate securely. We will be doing this in the next section.
Configuring GitHub and Git to use SSH Keys:
You maybe wondering why all the attention was spent on SSH, and SSH-KeyGen. Suffice to say SSH is one of the two ways a user can communicate securely with a public remote Git server such as GitHub. The other way is to utilize HTTPS and password based authentication. If a user is using git from the command line and SSH is set up to use a password, then a user may not even notice the difference between being prompted for SSH credentials and Github account credentials. It is important in these cases to realize which authentication method you are using. Some methods available to do this is to ensure that git is configured for one over the other. The key indicator that git is using SSH instead of HTTPS is that the remote repository URL will begin with a git://whereas a HTTPS URL will use the https:// protocol in order to start the URL. Instructions on switching between HTTPS and SSH can be found in the section titled connecting to a remote repository.
Where use of SSH pays off is when remote git commands are done repeatedly through automation. In this case SSH keys allow the user automatically run git commands on a remote git server without being prompted for the account password for the password of the user on the remote server.
Additionally SSH can be more secure then HTTPS due to its use of keys instead of passwords. Passwords are susceptible to Man-In-The-Middle attacks, Brute force attacks, and credential replay attacks.
Configuring SSH on GitHub:
This blog post will assume you have created yourself a GitHub account prior to beginning. If not you can do so here: https://github.com/signup?source=login
To set up your GitHub to use your SSH key pair we created earlier in this blog do the following.
1. Login to your GitHub account.
2. Select your GitHub user icon.
3. Navigate to the ‘Settings’ Menu option
4. In the Left side bar navigate to ‘SSH and GPG keys’
5. Under SSH Key select New SSH Key.
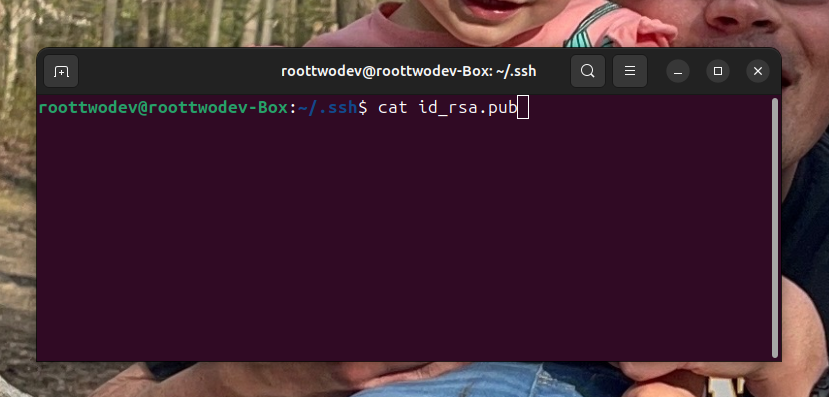
6. Open up a terminal on your system and use the ‘cd’ command to navigate to the .ssh directory we created earlier
7. Type the following command ‘cat id_rsa.pub’ This will print the contents of the id_rsa.pub file to the terminal
8. Copy all of the contents of the file from the first ssh-rsa all the way to the end of the comment line. The comment line should match the comment used for the -C flag when ssh-keygen was ran.
9. Paste the content into the ‘Key’ input box in Github.
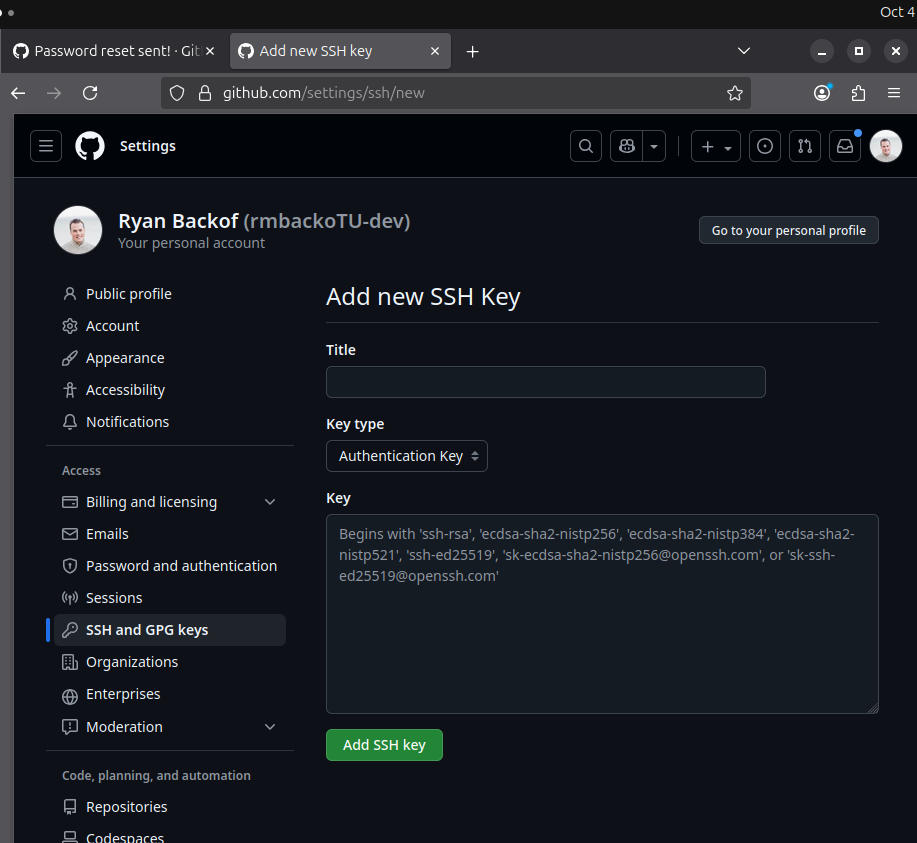
10. Title the key something that will be meaningful to you such as ‘Home Laptop SSH Key’
11. Proceed to click Add SSH Key.
Configuring Git to use a remote repository.
Now that our key is stored the next step is to make something remote or contribute to something remote. When working remotely with GitHub there are one of two ways to go about starting your repository. You can either choose to create the repository on GitHub, or you may choose to create the repository locally.
Creating the repository remotely first:
If you choose to create the remote repository first you can do so by navigating to your dashboard in GitHub and selecting New next to repositories.
Choose the following options:
If you choose to create the remote repository first you can do so by navigating to your dashboard in GitHub and selecting ‘New’ next to repositories.
Choose the following options:
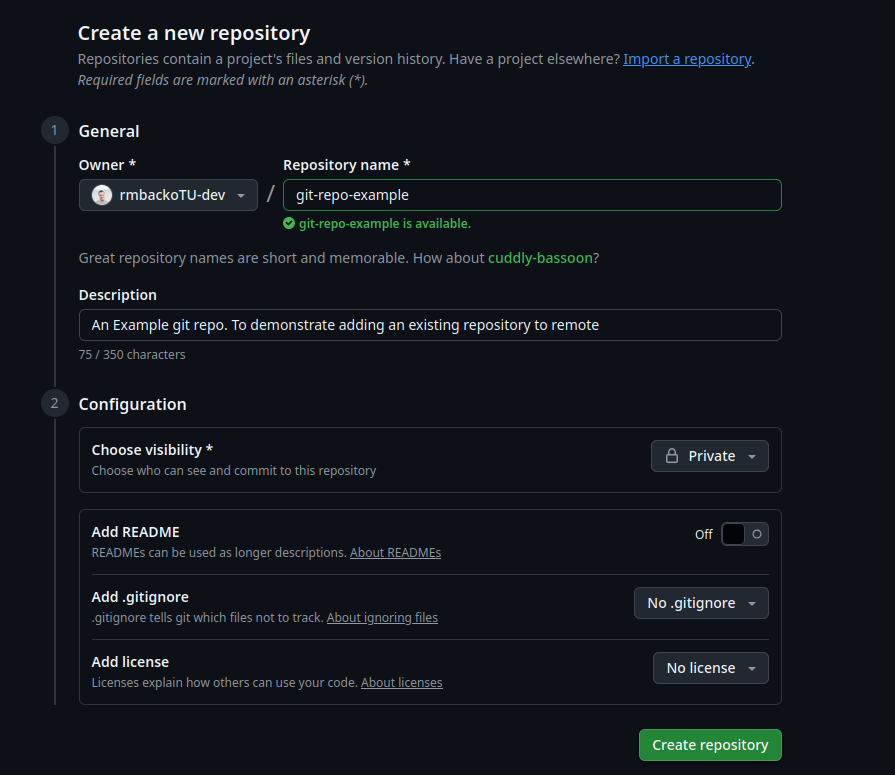
- Repository-Name: The name of your project
- Description: A brief description of what your repository will be used for.
- Choose visibility:
- Private is generally good for projects where you are learning something and do not want it to be released or part of a code portfolio
- Public: Is good if you are building a project you either want to or need to display.
Generally choosing private good for just playing around.
- Add README and Add .gitignore. These options are similar to steps from building your first local repository. The Add .gitignore has prebuilt .gitignore files however that can help with automatically ignoring build and configuration files for your chosen programming language environment. For example in Java a GitHub custom .gitignore may use a wild card to not include the target folder commonly created when compiling java code.
- Add license. It is best to select: No license if you intend the project to just be for learning. For other projects it is best to research each license type prior to committing to a license. User licenses dictate what someone can and can not do with your code when they download it.
Creating the repository locally:
If on the other hand the project is a project already on your machine use the following commands to push a local repository into a empty remote repository. These instructions can be additionally found on
docs.github.com/en/migrations/importing-source-code/using-the-command-line-to-import-source-code/adding-locally-hosted-code-to-github , Under the heading. Adding a local repository to GitHub using Git.
1. The first step is to create a empty repository. To avoid needing to deal with merge conflicts. ( A topic we will discuss later) Do not select the README, License, or .gitignore options
2. At the top of the repositories GitHub Setup page select SSH, then copy the URL.
3. In either a git-bash (if you are using windows) or bash terminal (if you are using linux or mac), use the change directory commands to navigate to your repository.
4. Type the following command and paste the url at the section that states remote url
git remote add origin <remote-url>

5 . To verify use the following
command to list which remote repositories are set.
git remote -
6. Finally use
git push origin main
Note: If your main repository is named master you will need to use the command git push origin master. The important point to note here is origin is the name of the remote repository, main is the name of your branch in your local repository
Note: If you get the error ‘error: failed to push some refs to ‘<remote url>’ Try to issue the command
git branch main. Or git branch master to navigate to your main branch before pushing.
7. Last but not least navigate to your remote GitHub repository and verify your first commit went through successfully. If it did congratulations you have added your local repository on to GitHub.
Pulling from remote:
For this next section of this post we will be discussing how to pull from a remote repository. We will be using the repository created using the section titled Create a remote repository first.
To pull from a remote repository which already exist remotely do the following:
1. In a command line either a git-bash command line (for windows users) or a git command line (for Mac and Linux users) Navigate to a directory that you wish to place the repository using the ‘cd’ command.
2. In a browser navigate to your preexisting repository
3. Select the code button, then select the SSH option.
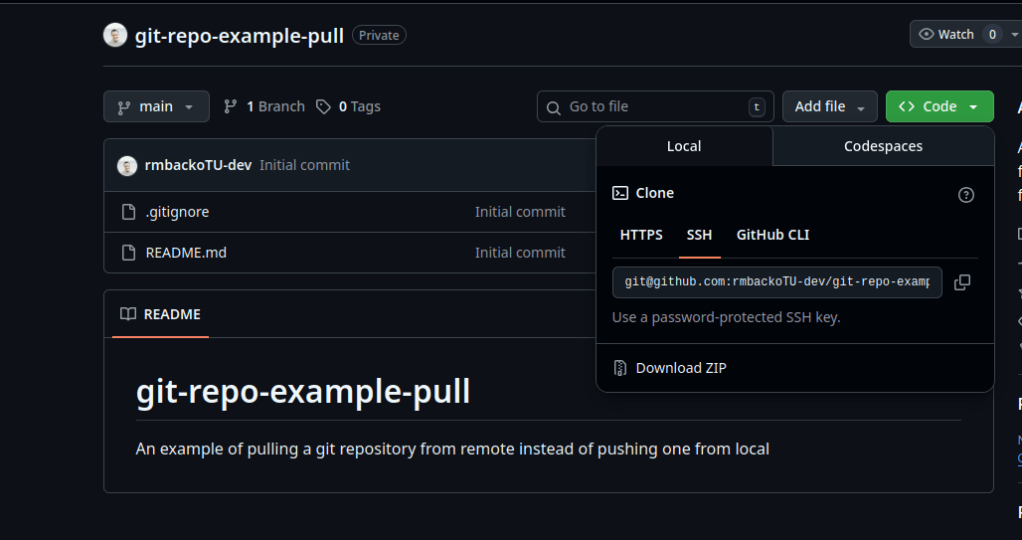
4. Copy the URL in the SSH option.
5. In the command line opened in step 1 type the following command replacing <remote repository> with the URL copied from GitHub.
git clone <remote repository>
You will be prompted for your SSH password. At this point you will have successfully cloned a remote repository. You can now begin to make changes to it and stage files locally to it on your own machine.
Conclusion:
After this post you should both understand the underlying protocol of SSH that allows you to authenticate to a remote server such as a remote git server. Be able to set up a new SSH key, and create and add a remote repository.
In the next post we will explore Gits Killer feature: Branching! I can even start to give everyone a sneak peak of how I have recently been using this feature to ensure I can build small maintainable features for my side projects.
References:
Ylonen, T., & Lonvick, C. (2006). RFC 4251: The Secure Shell (SSH) Protocol Architecture. Internet Engineering Task Force. Defines SSH as “a protocol for secure remote login and other secure network services over an insecure network.”
OpenSSH Project. OpenSSH Manual Pages (ssh, ssh-keygen). Source of the public key authentication description: “Public key authentication works as follows: The scheme is based on public-key cryptography…”
Trappe, W., & Washington, L. (2005). Introduction to Cryptography with Coding Theory. Pearson. Cited for explanations of one‑way functions and the conceptual model of public/private key operations.
GitHub Documentation. Generating a new SSH key and adding it to the SSH agent. GitHub Docs. Accessed March 30, 2026. Official instructions for generating keys and configuring GitHub to use them.
GitHub Documentation. Adding locally hosted code to GitHub using Git. GitHub Docs. Used for the section on pushing an existing local repository to a new remote.


Leave a comment