Introduction:
Bottom line up front: This guide covers what most developers should know about git, to save and manage their work.
This post is part two of the Git for New Developers series. In this post I will be going over
- The difference between staging and committing
- How to stage and add a file.
- How to view the history of a repository
- Other filtering features of git log and how it will help your software development workflow
Generally, this post is about how to get started with a new git repository, and then how to use git to keep track of work you have completed.
The differences between staging and committing.
First lets review what the purpose of version control is. Version control allows the user to reliably maintain versions in which changes to files had taken place. Version control additionally allows teams of people to communicate on changes that have occurred to files.
Version control is particularly useful in teams. Teams (groups) of people tend to have issues with communicating progress and deliverables. This is a generally accepted notion for organizational psychology.. However, when working with software we need to ensure that everyone on a team is creating the right thing, updating the right thing, and testing the right thing. With git and git log we can not only make sure that multiple people do not step on each others toe’s but we can also ensure everyone is on the same page.
How do we do this? The most preferable way is to be at someones computer and tell them which file is the right file. Realistically projects have deadlines and multiple people need to look at your files often simultaneously. So then what do we do? We communicate simple information that can be spread verbally or textually that will get everyone on the same page. Version control accomplishes this. Version control has the unique ability to state to a team, who, what, when, where and why of software being developed.
- Who: The person who made the software
- What: The description of the change that was made
- Why: What did the change address, what was the reason for the change
- When: A timestamp of when it occurred so the team can identify if the change is the latest and greatest.
- Where: What branch or release did this occur in. We will get into branches in a later branch but suffice to say they are a key feature of Git.
This leads use to staging and committing. Think of staging and committing as two parts of the same operation. They both seek to add a file to the repository. If they both add files to the repository why make two separate operations? The short answer is staging creates a verification step.
Simply put staging states that a file will be included in a version of a repository. Committing finalizes the version of the repository with the changes added. Which makes the process of adding to a Git repository two steps. Stage the files then Commit the version.
So how does staging provide verification? Staging allows us to verify the changes to files before we make an official version. We can view individual staged files using tools such as
git diff –cached --name-onlyWe can additionally use git diff –cached without the name-only flag to show all all of the lines that changed since our last commit.

Additionally git provides us with a way of not adding files we do not intend to save with the .gitignore file.In short staging provides use a means to verify what code we have written before we go ahead and save it.
How to add and stage your first file:
In git staging and adding files is pretty easy. Lets start by first creating an empty repository. Below is an example git repository to show you how it is done.
(Step 1.) To create a Git repository open your Command prompt, and navigate to the folder you would like to make a git repository.
(Step 2.) Next Issue the command:
git init
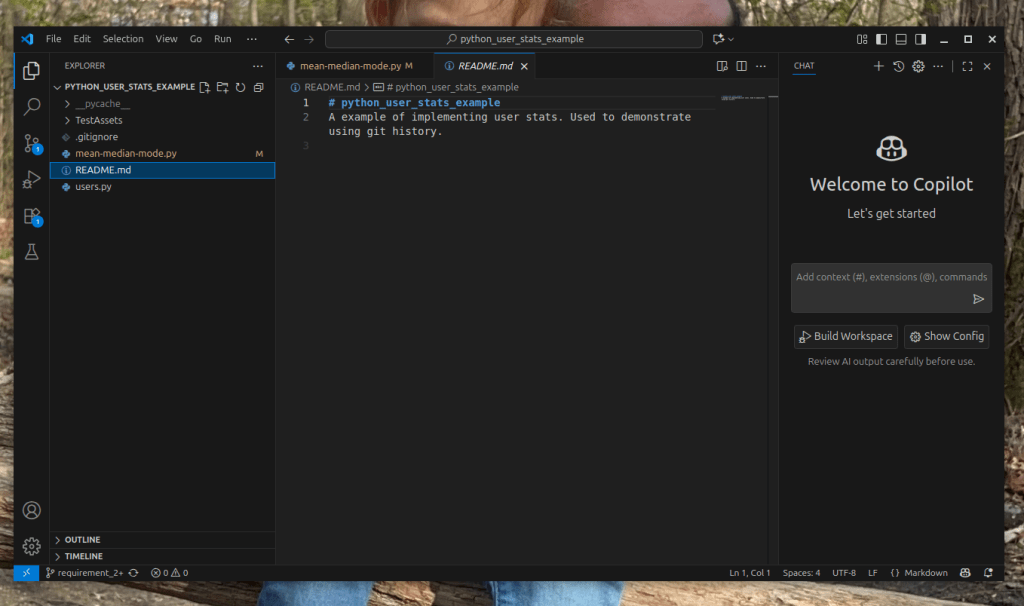
Usually when I go ahead and create a Git repository I will also go ahead and create a README.MD We can create a simple README.MD by opening up VSCode.
(Step 3.) To open up Visual Studio Code (VSCode) simple type Code .If VSCode was installed correctly. This should open up the VSCode window.
(Step 4.) From I usually will create a new file called README.MD to start my project. I use this file to document my requirements for the project. MD stands for Markdown. For more information about formatting a Markdown file refer to https://www.markdownguide.org
I may cover mark down in a later post. It is usually sufficient to include a heading using which is proceeded with a # symbol and a simple paragraph describing your project.
Below is an example of my README.MD:
(Step 5. ) After you create your README.MD add the file to your git repository there are two ways to do this.
(Option A.) In a command prompt type:
‘git add README.MD’(Option B.) Using VSCode GUI do the following:
- In VSCode navigate to View>Source Control and open up the Version control menu.
- In the Version control menu select the + symbol next to the README.MD file to add it to the git Respository.

(Step 6.) After you add you can check that your file is stage One two ways
(Option A.) By issuing the command:
‘git diff –cached –name-only(Option B. ) By using VSCode GUI. VSCode Version control window will show all staged files in the version control window as green meaning they have been committed
(Step 7.) After you verify you are ready to make an initial commit to you repository. This can be done one of two ways.
(Option A.) For command line type the command
git commit -m “Initial Commit”(Option B.) In VS Code, navigate to the version control menu and type in the Message box shown above the Commit Button “Initial Commit” then select Commit.
Congratulations you have started your first git repository. Before we move on we should discuss a few words about the first commit. The initial commit in Git.
The Initial Commit:
Git utilizes history to keep track of changes in a git repository. There are two rule general rule of thumbs I use when using git, when it comes to how git keeps track of history
- Never overwrite History on a remote git repository you do not own.
- If you need to revert to a state prior to the initial commit you are better off restarting the repository.
For this reason I generally keep the initial commit pretty basic. An initial commit should be thought of as a commitment (pun intended). You can think of this as stating to git “Alright we are ready to start the project everything that comes after will be the project.”
The .gitignore file (optional):
Earlier I mentioned the ability to not include files that should not go into our final repository. While not important now when the intial commit only includes the README.MD file, another file to consider adding would be the .gitignore file
The .gitignore file uses basic pattern matching to ignore some files when staging all the files in your repository.
A common use of the .gitignore is to prevent the staging of configuration files (which may contain test passwords), or build files which the user may not need to compile your application. The general format for .gitignore files is the following:
- A * matches zero or more characters of any type and is known as a wild card
- A ? is matches one character only of any type.
- A ‘/’ always indicates a directory seperator. If you want get to explicitly ignore the contents of a specific directory you would include a line indicating /<directory name>
If you wanted to ignore specific content inside a directory you would indicate the content with another ‘/’. such as /<directory name>/<content> - A ‘!’ negates the pattern following it. Essentially it says don’t ignore these files when staging and committing
- A ‘#’ is viewed as a comment and is ignored by git. # Is meant to be read by the user.
Below is a sample .gitignore for our sample project which includes ignoring python build files. This is sourced from github’s reccomendations for .gitignore files related to python:

(Update): A quick look at git status:
UPDATE: This was not originally included in the original post.
As I was coding the other day. I added some code to my repository to stage it. I quickly realized, I wanted to see what was going to be committed in my next commit when I went to type the git commit command.
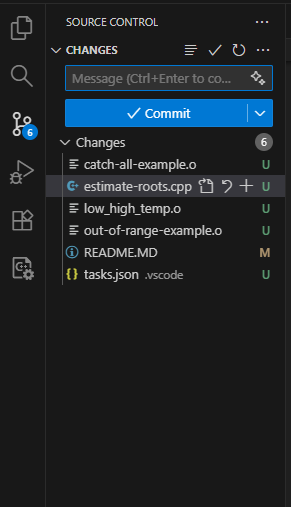
VSCode has a nice way of showing us this information in the version control window. It shows us unstaged commits in green with a U next to them, as shown below.
However, if you want to figure out this information without using VSCode, or by using git on the command line another command comes in handy that command is:
git statusGit status will show you multiple sections. One section shows what we have staged, while another section shows us files we have yet to add. This can be seen below
This command is very useful to determine which files will be going into the next commit before we commit code to a respository.

Git status even offers us another useful command which is:
git restore --staged <file>As shown below this command allows use to remove a file if we added the file to our commit by mistake. This can happen if we realize that maybe we have a solution for a problem, but we are not quite ready to add a file that is not part of that solution. An example can be shown below with the example of unstaging a README.MD file that is not quite ready for prime time.

A quick look at history before we conclude:
Before we move on to coding. I would like to review how we keep track of what we are doing and what we have done in a git repository.
To talk about git history we need to talk about the git log command. The git log command shows all of the commits you have made to a repository in reverse chronological order (Pro Git, Chacon and Straurb).
Git log is a key command in any software developer’s workflow. The reason is that in order to be a successful developer you need to be a successful at time management, task tracking and team communication. Git log not only helps us stay on task by giving us a complete picture what has already has occurred, we can also use it to track how close to done we are.
Lets get into an example. A task could be to implement a new statistical software to take in a group of user visit metrics. The user visits could be grouped like this.
{
“Users”: [

{Name: “User1”, Visits: 19, Articles_Read:10},

{Name: “User2”, Visits: 13, Articles_Read:25},

{Name: “User3”, Visits: 5, Articles_Read:3},

{Name: “User4”, Visits: 5, Articles_Read:2},

{Name: “User6”, Visits: 5, Articles_Read:3},

{Name: “User7”, Visits: 4, Articles_Read:2},

{Name: “User8”, Visits: 3, Articles_Read:2},

{Name: “User9”, Visits: 15, Articles_Read:5},

{Name: “UserX”, Visits: 4, Articles_Read:2},
]

}
This is a very common format known as JavaScript Object Notation. (JSON). Your boss tell you that they want the averages (mean, median, and mode) of how many times the users have visited and read articles on a website.
Your first step should be to determine your requirements. We want mean, median, and mode of user visits to our site.
We then proceed to write these out as requirements:
- As a user of this statistics applications I shall be able to input a list of users and their site visit statistics in JSON format
- As a users of this statistics application I shall be able to determine the mean of all the user visits from the list of input user statistics
- As a users of this statistics application I shall be able to determine the mode of all the user visits from the list of input user statistics
- As a users of this statistics application I shall be able to determine the median of all the user visits from the list of input user statistics
- As a user of this statistics application I expect to be notified if the list of user statistics can not be used to determine the mean of the user statistics
- As a user of this statistics application I expect to be notified if the list of user statistics can not be used to determine the mode of the user statistics
- As a user of this statistics application I expect to be notified if the list of user statistics can not be used to determine the median of the user statistics
- As a user of this statistics application I expect to be notified if the list of user statistics is empty
You may look at the above list and think to yourself 8 requirements. That is a lot of work I have to do, I better get started. But what if we broke each of them up. Say each requirement we broke up into one coding task.
A better strategy is to simply break up each requirement into an individual coding task. Each coding task is then added as its own commit. This is a good way to start tracking progress. Most pieces of software are not built in a day. But by making progress towards a coding task you are able to set your pace on how long you think it will take to finish, and have demonstrable results.
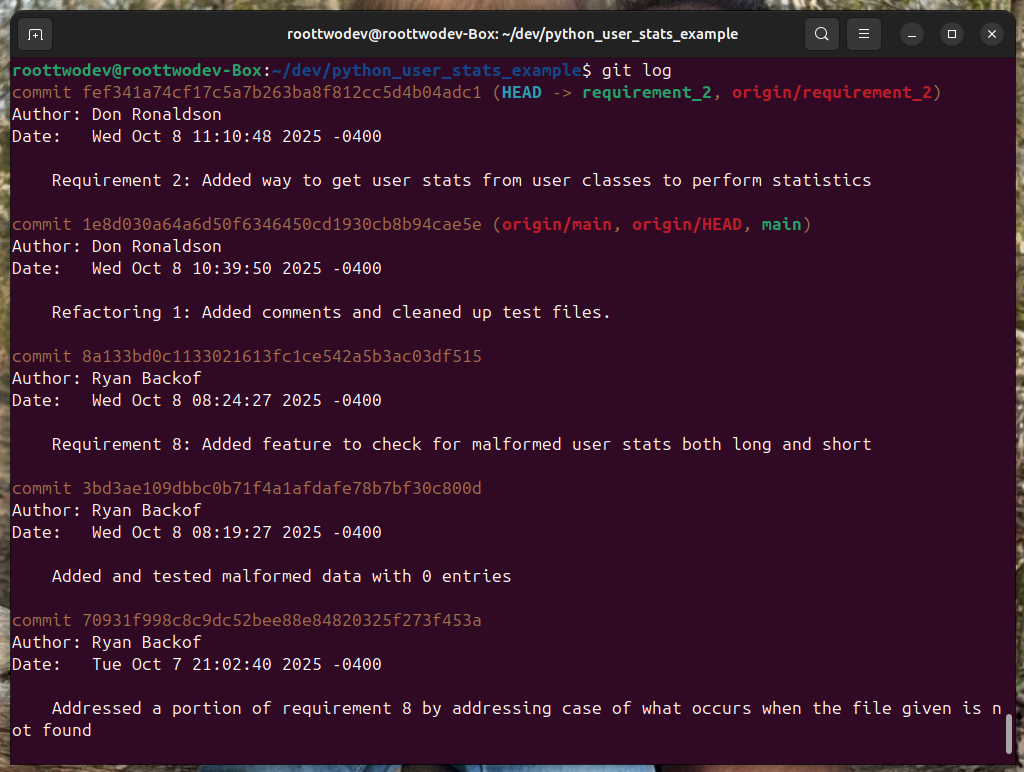
Back to our example: Lets suppose we managed to accomplish 2 of our 8 requirements in one day of coding. That is a big deal we are a 4th of the way done. How do we show that to our boss though. After all they want to know if we have done the work. Simple use the ‘git log’ command.
A simple output will look like following:

Now we can show our boss all the wonderful progress we made. We can even estimate a percentage. We have completed 2 of our 8 requirements. We said so in our commit messages. We are a 4th of the way done.
If the above information is not quite the information you (or your boss) is looking for. Git log also offers a way to format the git log output called Pretty formats. They are available using the git log flag –pretty. Below is a list of each format that can be used for pretty and what it will show (git-docs, accessed 2025).
- Oneline:
- Will show
- <hash> <commit title>
- Will show
- Short:
- Will show
- Commit: <Hash>
Author:<Author>
With a title line for the body
- Commit: <Hash>
- Will show
- Medium:
- Will show
- commit <hash>
Author: <author>
Date: <author-date>
With a title line and commit message for the body
- commit <hash>
- Will show
- Full:
- Will show
- commit <hash>
Author: <author>
Commit: <committer>
With a title line and commit message for the body
- commit <hash>
- Will show
- Fuller:
- Will show
- commit
- Author:
- AuthorDate:
- Commit:
- CommitDate:
- With a title line and commit message for the body
- Reference:
- Is a single line with a <abbrev-hash> (<title-line>, <short-author-date>)
We can see each of these formats by using the command
git log –pretty=<format name>Where the format name is one of the formats listed above.
All of these formats have their place, but it will largely depend on the problem you are trying to solve. For example showing Committer can be useful when tracking who integrated changes into a final build. Commit date may be useful if you are attempting to figure out work that happened on a given day, and lastly the Abbreviated hash or <abbrev-hash> can be used when executing other git commands that modify commits made to a repository. More details will be given on all of these in later posts.
Back to our example though lets go through how git log can help with task tracking and team communication.
To show that we are going to need a friend. For that I have my friend Don Ronaldson (He is not real, he is conveniently made up for this example). Now Don Ronaldson was being a super helpful teammate has stepped up done a little pair programming with me and offer to help us. Good job Don! The problem is however, we really want to show off the work we’ve done to the boss metrics help us get promotions after all, but we have Don commits littering up our ‘git log’
Luckily git log has an answer for this. Git log allows us to specify filters for all sorts of things. For now lets do the most obvious one author. The ‘—author’ flag allows us to see the contributions of a single person. It looks like the following.
git log –author=”Ryan Backof”
Lets say we are trying to get all the work we did yesterday. We can use the –before flag to show commits earlier than a given data. Additionally we can se the –after flag to show commits later than a given date.
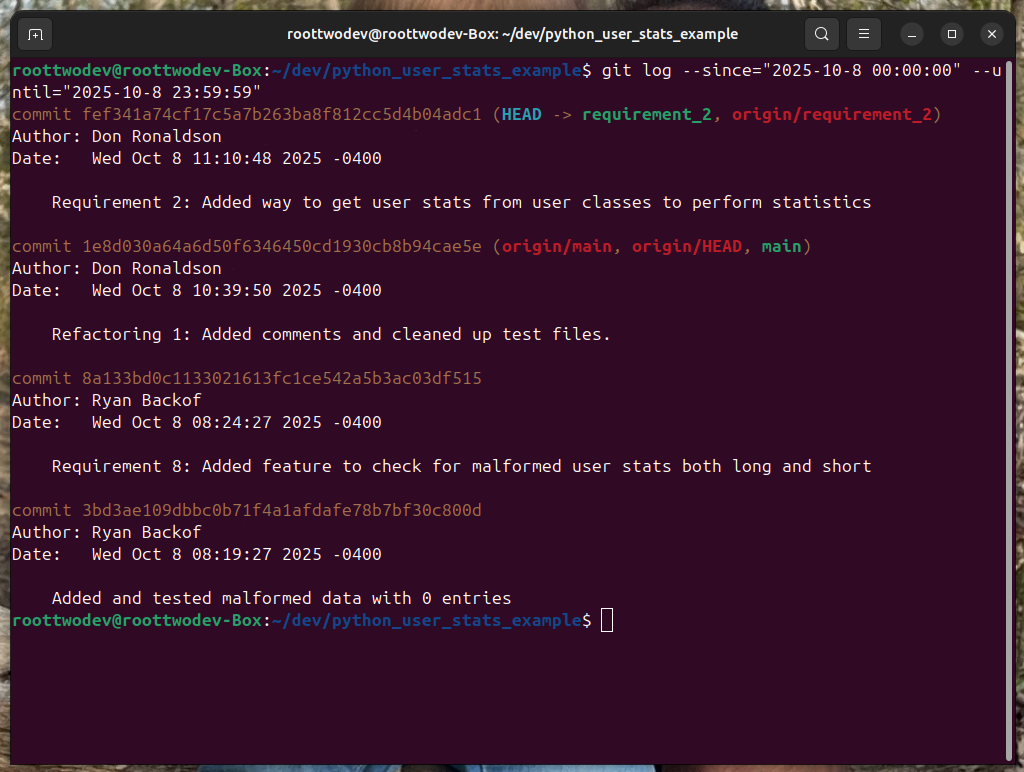
Note that the commits are mutually exclusive meaning they do not include commits made on the date it self. In order to get commits on a given day we have to use both the –since and the –until flag to build an exclusive range and include the time stamps. An example of this is below:
git log –since=”2025-10-08 00:00:00” –until=“2025-10-08 23:59:59”This will produce the below result:
This is only a small sample set of how git log can help improve your development workflow. In future post we will discuss git logs other capabilities as they come up. For example git log will tie in very closely with working remotely and working on branches two of git’s best features.
Conclusion and looking forward:
Git provides a large amount of features which can help improve time management and team communication when doing software engineering. This is just a small sample set of all of the ways git helps teams perform software development easier and more efficiently.
In the blog post we will be looking at using git remotely and securely with SSH. This will allow you to really kick team work and collaboration into high gear.
Sources:
Git-SCM Documentation (2025); git-scm.com/docs
Pro Git (2025) ; Chacon Scott, Straub Ben. https://git-scm.com/book/en/v2
Markdown Guide (2025); https://www.markdownguide.org


Leave a comment